Google Tag Manager (GTM) offers a more efficient integration process compared to a direct integration of our Tracking code.
Note
This article covers the integration of client-side tracking. For information on installing Server-to-Server (S2S) in Google Tag Manager, please see S2S via GTM.
If you wish to review the source code of our tags before adding them to your container, you may view them here:
GTM Tags |
|---|
These tags are published and maintained by Awin employees.
Step 1 - The Advertiser MasterTag
The Awin MasterTag (also referred to as the Journey Tag) is a JavaScript library that contains all the necessary functions for our tracking solution.
For more information on this tag’s function, please see the Advertiser MasterTag.
In Google Tag Manager, navigate to “Tags”.
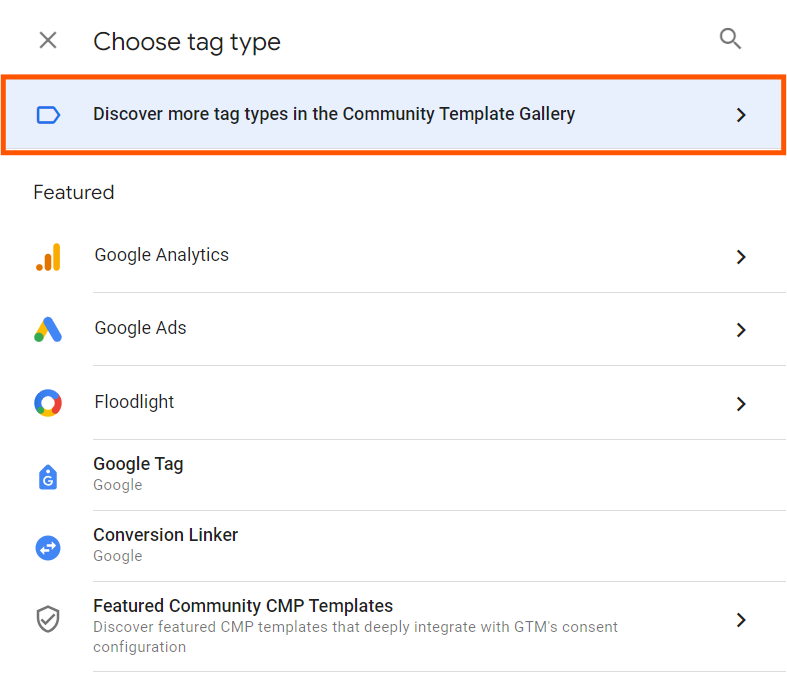
Click “New” and choose “Discover more tag types in the Community Template Gallery”.
 Searching for “Awin” will reveal the Advertiser MasterTag. Select this tag published by Edin Cuturic.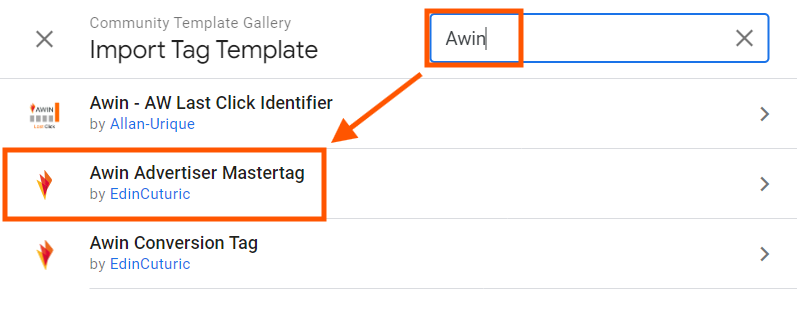
Add this tag to your workspace, accepting any notices. This tag will need permission to inject scripts on your site on your behalf.
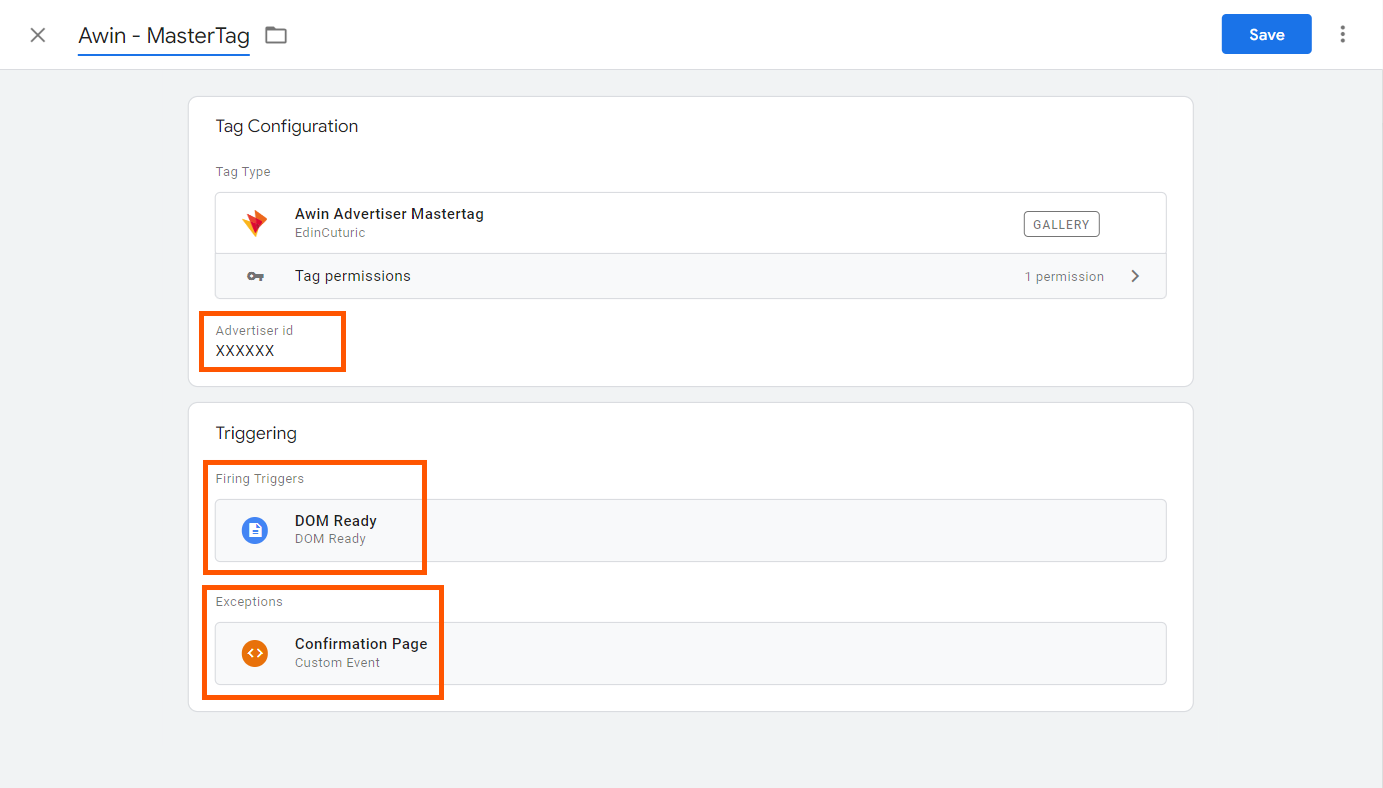
Please configure the tag with your program’s associated Advertiser ID (MID) and the relevant triggers.
Step 2 - The Conversion Tag
Now that you’ve configured the MasterTag, we’re ready to begin the integration of the Conversion Tag. Before we integrate the tag itself, we’ll need to add automatic deduplication and the Channel Parameter.
Last Click Identifier
The AW Last Click Identifier tag will allow our tag and, thus, our systems to determine who the last paid click referrer was before a customer completed checkout. In the case that this referral came from an Awin Publisher, we can ensure that they’re rewarded for their action.
Start by adding the tag in the same fashion as before. This time, select “Awin - AW Last Click Identifier” published by Allan Urique.
Add this tag to your workspace and accept any applicable notices.
Configure your tag as shown below, taking special note of the variable configurations.
.png)
With the correct configuration, you can save this tag.
Next, we’ll create a variable to read the value of the Cookie created by this tag. While “AwinChannelCookie” is the default, you’re welcome to define your own or refer to another.
Navigate to “Variables”.
Create a new “User-Defined Variable”.
Set the cookie name based on the previously determined name in the last step.
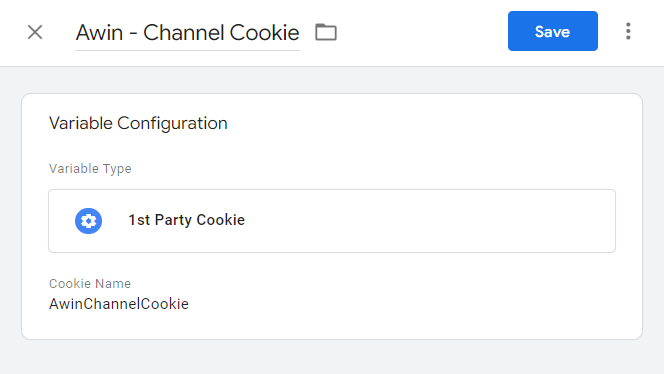
Keep note of this new variable as you’ll need to reference it in your Conversion Tag.
The Conversion Tag
For specific information on each of the parameters’ uses, please see our article on the Conversion Tag.
As a quick reference, the only optional fields in this tag are Customer Acquisition, Custom Parameters, and Product Level Tracking.
Start by adding the tag in the same fashion as before. This time, select “Awin Conversion Tag” published by Edin Cuturic.
Add this tag to your workspace and accept any applicable notices.
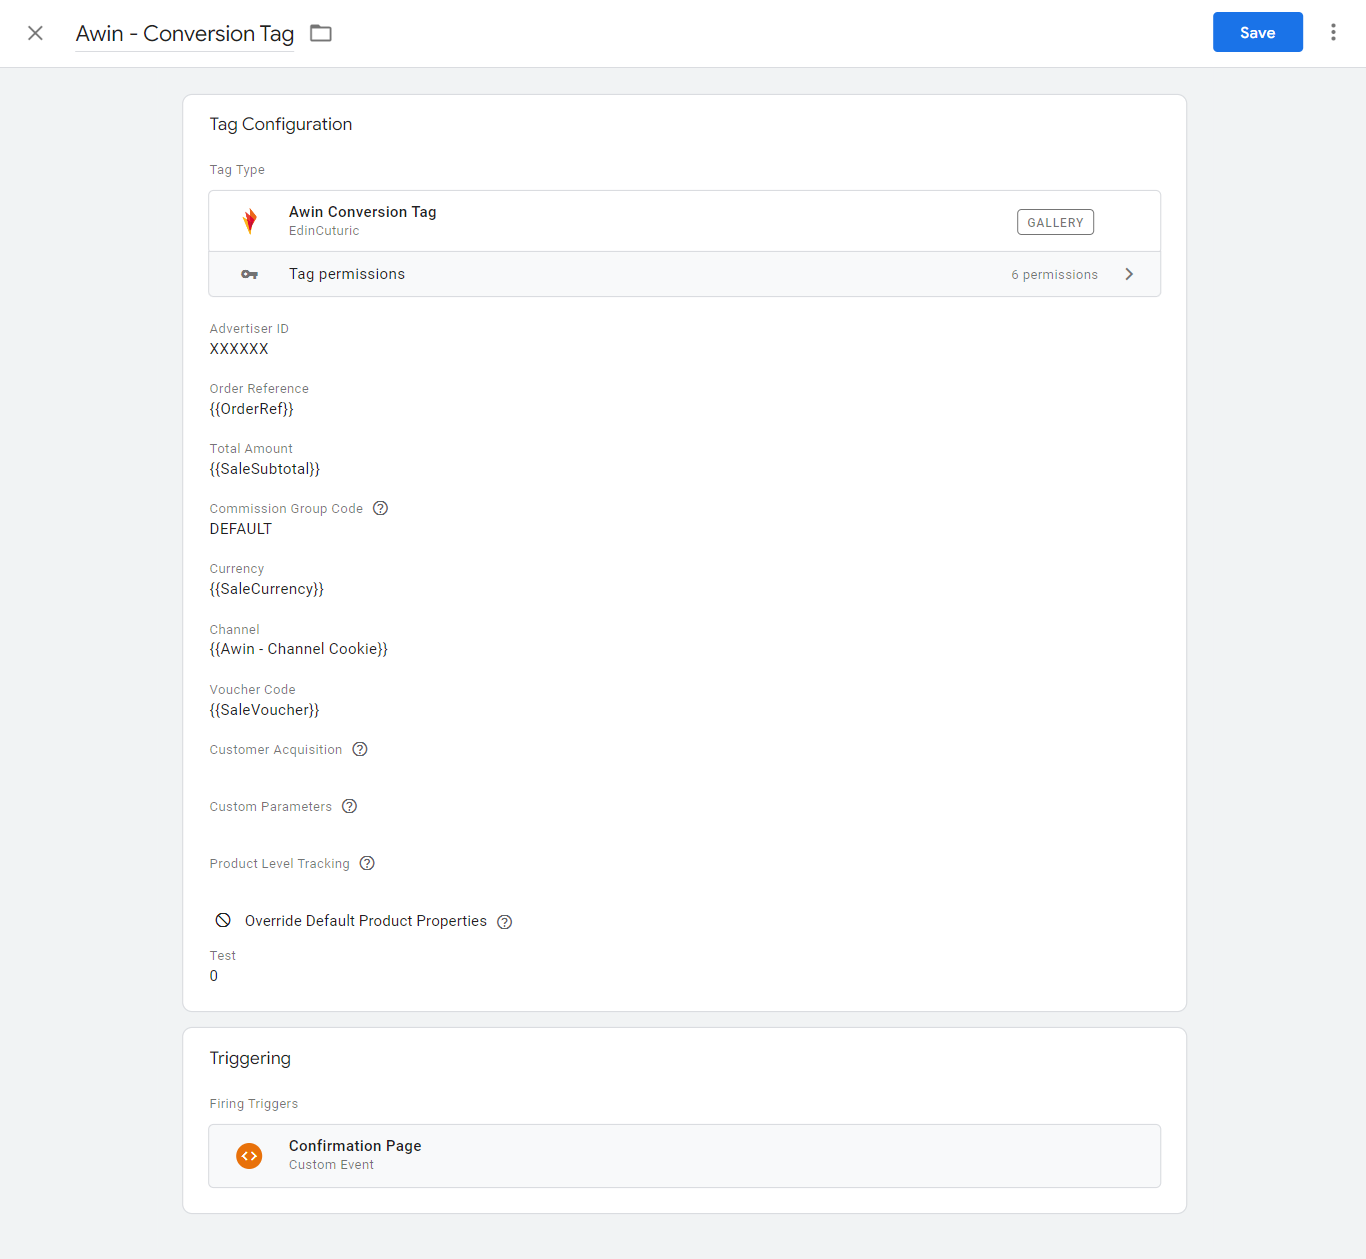
Assign your variables as noted. If you’re unsure of best practices for these variables, please see the table in our Conversion Tag article.
Although not depicted, please ensure that your Awin MasterTag is configured as a “Clean up tag” for the Conversion Tag. This enforces a proper triggering order during your Transaction event.
Notice
The variables shown in the above screenshot are not how they should be configured in your Tag. These are solely abstract references for the kinds of data we expect in these fields.
For the expected variable types and formats, please refer to the Parameter Guidance article.
Take special care to assign the correct variable for your Channel parameter. This will be the variable defined earlier on in this process.
Server-to-Server Tracking
You’ve completed the client-side integration of Awin tracking! From here, we recommend that you test your integration and continue on with integrating the mandatory server-to-server portion of our tracking.
You’re welcome to choose from any of the below-linked integration methods for Server-to-Server. You should choose this route based on the most convenient for your infrastructure configuration.
Consent
As an Advertiser, it is your responsibility to obtain cookie consent for Awin’s tracking and inform us of the consent status. We strongly recommend making use of Awin Consent Signals in Google Tag Manager. Further information regarding consent can be found on Consent Framework.
Practical Tips (GTM Custom Solutions & Codes)
Discover a solution for your use case in the following collection.