The Communication Center is a powerful tool within our platform that allows you to effectively communicate with partners. The tool makes it easy to share program updates and promotions with your partner base, in a form of a newsletter or a group email. It helps you build and maintain strong relationships with your partners, share relevant information, and increase your performance.
When to use the Communication Center
We encourage you to use this tool whenever you update your affiliate program with:
Upcoming offers
New promotions
New creatives
Changes to commissions
Updated terms and conditions
New product feed
How to create a communication
Find the Communication Center in the platform by navigating to Toolbox > Promotional > Communication Center.
To create a message, click Create and choose one of these options:
Editor: Use a simple text editor to write your message. You can add images, text, and personalized details like the publisher’s name or ID.
HTML: If you want more control over the design, you can use your own HTML code. Make sure it’s no wider than 800px so it looks good on most email platforms.
Editor overview
When creating a message, you’ll work on three parts: header, body and footer.
Header: Automatically populated with the logo you uploaded to your profile. You can replace it by clicking on the image icon, or resize the image by adjusting the shape size.
Body: This is where you create your message. Use the toolbar to customize the design by adjusting fonts and colors, adding lists, bullet points, images, and even emojis. You can also:
Add new sections by clicking the + button.
Use dynamic fields like
!!!name!!!to automatically add the partner’s name or!!!id!!!for tracking links.
Footer: This part includes legal details and an unsubscribe link. It is automatically included in every communication and cannot be edited.
All progress is automatically saved, so you can easily continue to create your communication later by finding it saved as a draft and clicking the pencil icon to edit it further.
How to notify your partners about offers and promotions
The Communication Center is integrated with the My Offers tool, allowing you to quickly add any pre-created offer or promotion directly into your communication.
In the Body, click the + icon, then choose Voucher or Promotion.
Select the offer you want to share and click the orange Select button.
The details will appear in your message automatically, saving you time.
You can select and insert multiple offers in the same email.
Important
If you schedule an email with an offer and later update that offer in My Offers, the changes won’t appear in your message unless you update it manually.
How to send the communication
Once your communication is ready, you can either save it as a template or send it to your partners.
To send:
Click on Communication Settings to finish the setup.
Fill in the following:
Subject line: Up to 50 characters.
Communication Type: select Normal.
Category: Choose between Programme Update or Promotional News.
Audience: You can send to all your partners or a specific group by using the custom selection.
Send date: Select the date and time you want your message to be sent.
Important
The Communication Center is not a chat box. Partners will receive your message within the platform but won’t be able to reply directly.
How often should you use the Communication Center
Communication is key in affiliate marketing. It helps build strong relationships with your partners. When they feel informed, they’re more likely to stay loyal to your program.
We suggest using the Communication Center whenever there are updates or new offers.
Triggered communications
In addition to regular emails, you can automatically send messages to partners based on performance metrics. For example, you can set up an email to be sent when a partner reaches 100 sales - this can motivate them to keep performing well.
Setting triggers
You can create triggers using one or more of the following metrics:
Clicks
Sales
Commission earned
Join date
Use triggers to:
Celebrate high performers - Congratulate and offer incentives.
Support underperformers - Reach out with guidance.
Engage new partners - Welcome and encourage growth.
Reactivate inactive partners - Identify and address drop-offs.
How to set up triggered communications
Go to Toolbox > Promotional > Communication Center and click Create.
Write your message and go to Communication Settings.
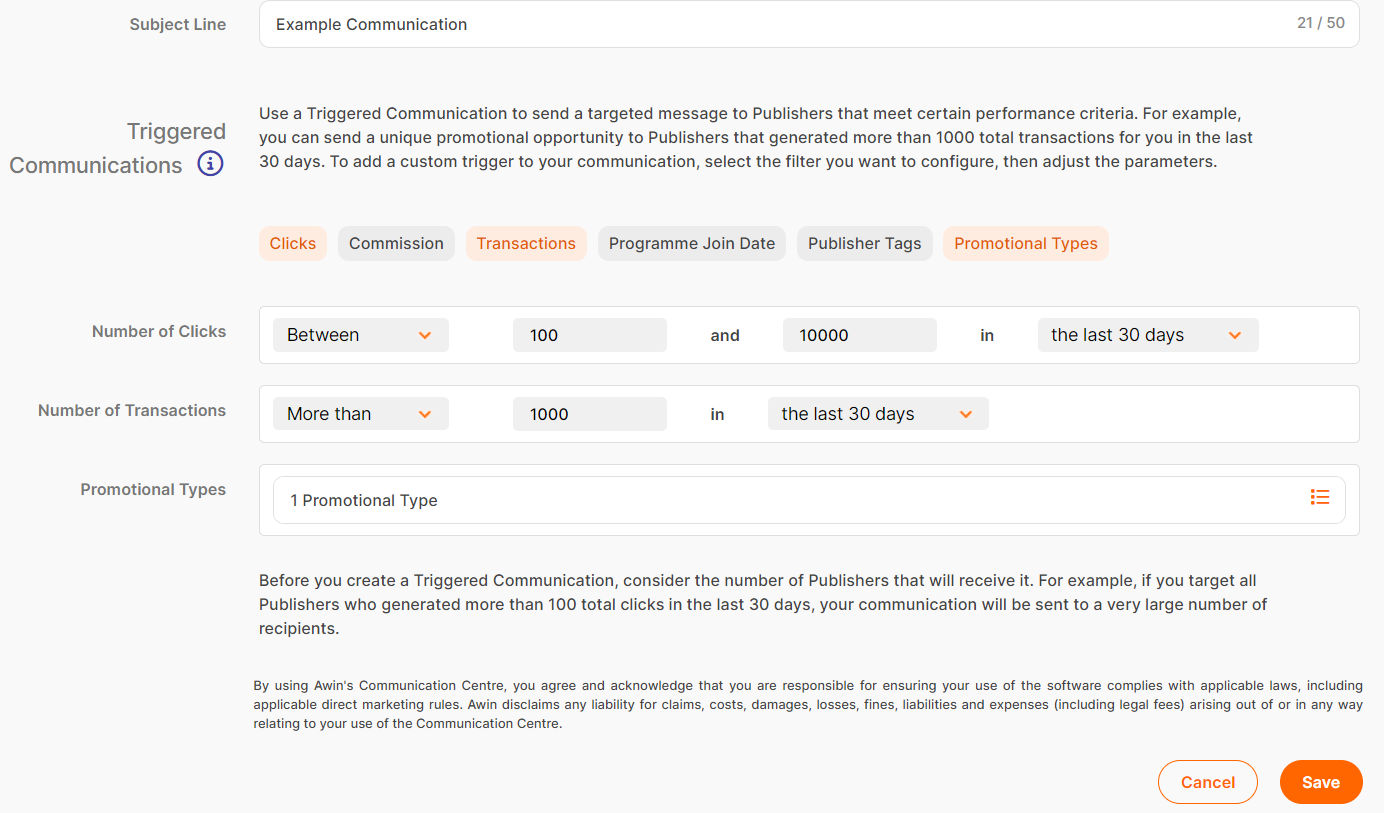
For Communication Type select Triggered.
Choose your trigger conditions (e.g., clicks, sales, commission).
Optionally, filter by Publisher Tags or Types.
Example:
Send an email to partners who:
Generated 100–10,000 clicks
Made over 1,000 sales in the last 30 days
Are tagged as Content Creators or Influencers
Managing triggered communications
Find all your automated messages in the Triggered Communications tab. Here you can:
View conditions and status.
See audience size and send dates.
Edit, duplicate, pause, or delete messages.
In the Communications tab, you can also see the daily performance of your triggered communications, with information like:
Creation date
Subject line
Audience size
Delivery status
Creator info